Toon Boom tutorial.
Bouncing ball tutorial.
Changing the opacity: Above the colour palette there is a
small palette looking circle, Change the “Alpha” of the colour inside the
circle to control the alpha.
Drawing the shadow: As the object (ball) moves higher the shadow gets smaller and the opacity decreases, making the shadow get lighter.

Key framing: Are essentially the same as "Motion Tweening" in Adobe Flash. Using the key frames to make a second location for the object, it will do the frames for you, saving you from drawing every frame. Not only can you use it to 'Motion tween' across the screen you can distort it and make it squash upon landing and also spring back to shape as it is once again bouncing in the air. To reposition the key frames to arch the fall you don't even have to press (I) for another Key-frame.
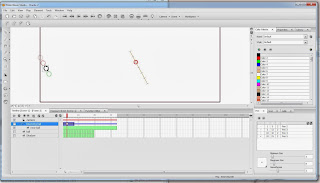
 The line that you see in this image is the motion line that follows the motion of the animation, the circle on the end of it is the key frame that is currently selected. It is figuratively a bone spine with the movable parts.
 This image is the timeline, the timeline allows you to see the layers that you are using and the green rectangles are the frames.
Dragging a drawing layer to a "Peg" layer will make the "Peg" layer a parent layer, this is how the key frames were created.
"Peg layers also known as trajectory layers do not contain any drawings and are used when working with advanced puppet rigging in digital animation software such as Toon Boom Studio. They are motion paths that you can use to add path articulations or use the Inverse Kinematics tool.
In traditional animation, a tool used to ensure accurate registration of action as cel layers moved. "
In traditional animation, a tool used to ensure accurate registration of action as cel layers moved. "
"In Toon Boom, a drawing element is an individual layer linked to a
folder containing all of the drawings exposed in this particular layer
and even drawings that are not exposed but are available to this layer."
As you see the ball is now bouncing upward, this was by moving ahead another 8 frames and adding another key frame pressing (I) ... Doing the same as before I arched the movement to make it look more realistic.
Remember: When making a key frame with ( I ), make sure you are on the peg layer, in this image this layer is labelled "bouncing ball".
Using the keyframe once more time, I used it to extend the movement, making the ball fall back down to the ground.
Toon boom short-cut, controls
- A-S Shuffle through frames Left and right.
- D-F Allows you to shuffle through the layers.
- C-V allows you to rotate the canvas.
- Z-X Allows you to zoom In/Out.
- R Duplicates a frame.
- I Inserts a new frame.
Scene manager - Ctrl+shift+M
Swinging-Pendulum tutorial
Like the bouncing ball tutorial, we drew the pendulum frame by frame using the time line at the bottom of the program used. Here is a GIF image that I made in Adobe Flash using print screens. In the image you can see that as the image starts to move, the pointer moves too this is because the pointer has to be on that frame to see the image drawn onto it.
FINAL RENDERS
CHARACTER DESIGN
That character I wanted to design was intended originally to be something furry of sorts, I thought it would be fun to experiment with techniques to making fur, because I know there are many ways of achieving this effect. First off I am going to make example samples of making the fur effect, pick out the colours I need to draw the character it is that I am


No comments:
Post a Comment